Checklist for Safe Circuit Breaker Maintenance
Share
Maintaining circuit breakers is critical to prevent electrical hazards like fires, shocks, and equipment failures. Proper maintenance ensures safety, reliability, and compliance with U.S. standards like OSHA and NFPA 70E. Here's what you need to know:
- Follow a regular schedule: Annual checks are recommended, but high-demand environments may require more frequent inspections.
- Use the right tools and PPE: Insulated tools, flame-resistant clothing, and arc flash suits are essential.
- Follow safety protocols: Lockout/tagout (LOTO) procedures and voltage testing are mandatory before starting work.
- Perform thorough inspections: Check for visible damage, loose connections, and corrosion.
- Test electrical components: Conduct insulation resistance and overload tripping tests to ensure proper function.
- Document everything: Keep detailed records for compliance and future reference.
Skipping maintenance can lead to serious risks, including power outages and costly repairs. By following these steps, you can protect both equipment and personnel effectively.
How to Safely Inspect Circuit Breakers with Ray Kline, CMI®
Required Tools and Personal Protective Equipment
Using the right tools and personal protective equipment (PPE) is critical to avoiding serious hazards during circuit breaker maintenance. Below, we’ll cover the essential tools and PPE necessary for safe operations.
Insulated Tools You Need
When working with circuit breakers, always use insulated tools rated for up to 1,000V AC or 1,500V DC. The insulation - whether rubber or plastic - must be in perfect condition to provide adequate protection. Common insulated tools include pliers, screwdrivers, and wrenches.
The cost of insulated tool sets can vary widely. Basic sets start at around $65, while more comprehensive kits can exceed $500. Choose tools that meet safety standards without compromising your budget.
Before each use, inspect your tools for visible damage like cracks or cuts in the insulation. Damaged tools can expose you to electrical shock, making them more dangerous than using non-insulated tools.
Personal Protective Equipment
PPE plays a vital role in reducing the risks of shocks, arc flashes, and burns. According to statistics, workers in construction and extraction industries account for 40% of electrical fatalities, while those in installation, maintenance, and repair make up 20%.
Start with a risk assessment to determine the appropriate PPE. Essential items include:
- Insulated gloves
- Flame-resistant clothing
- Arc flash suits
- Face shields
Inspect all PPE for signs of wear or damage before use. Standards like NFPA 70E offer guidance on choosing the right PPE, using methods such as Incident Energy Analysis and the PPE Category Method.
Stay informed about updates to NFPA 70E and ASTM standards, as these evolve to address new safety concerns. Additionally, every team member should undergo training on the proper use, care, and maintenance of electrical PPE.
Lockout/Tagout Devices and Voltage Testers
Once you’ve equipped yourself with the right PPE, the next step is to ensure power isolation using lockout/tagout (LOTO) devices and voltage testers. LOTO devices are critical for preventing accidental re-energization of circuits. These include:
- Padlocks
- Lockout hasps
- Circuit breaker lockouts
- Warning tags that indicate who is performing the work and when it started
A study from 2008 revealed that 22% of service-aged circuit breakers had issues with their protective trip units, and 10.5% failed to trip at all. This highlights the importance of proper isolation and testing.
Always verify that circuits are de-energized using voltage testers before beginning work. Test every conductor and phase, and double-check your voltage tester on a known energized source both before and after testing your work area. Tools like digital multimeters, non-contact voltage testers, and proximity voltage detectors each serve a unique purpose in confirming safety.
Only proceed with maintenance once you’ve confirmed that all circuits are de-energized.
Safety Steps Before Starting Maintenance
Taking proper precautions before servicing a circuit breaker is essential to avoid risks like electrical shock, arc flash, and other serious hazards.
Lockout/Tagout Procedures
The Occupational Safety and Health Administration (OSHA) requires adherence to the Control of Hazardous Energy standard (29 CFR 1910.147), which mandates lockout/tagout (LOTO) procedures to prevent accidental energy release during maintenance. Begin by notifying all affected employees about the planned shutdown.
Identify the circuit breaker you’ll be working on by carefully checking panel labels. Turn off the power by switching the breaker to the "off" position, then confirm the equipment is de-energized using a voltage tester or multimeter. Once confirmed, immediately apply a lockout device to prevent the breaker from being re-energized by mistake. Attach a tag that includes your name, the date, and the reason for the lockout. Double-check that the lockout device is secure, the tag is clearly visible, and inspect for any residual or stored energy in the system.
"Lockout/tagout procedures should be used any time an electrical device or circuit is being serviced." – Ohioline
Voltage Testing and Documentation
Before starting any work, test all conductors and phases using a reliable digital multimeter or non-contact voltage tester. To ensure accuracy, always test your voltage tester on a known live source both before and after use.
Keep detailed records of all voltage readings in your maintenance log. Include the time, date, equipment tested, tools used, and specific measurements. Proper documentation is critical - not just for tracking maintenance but also for compliance. Consider using a Computerized Maintenance Management System (CMMS) to digitize and organize these records, making them easier to access and manage.
Once the circuit is confirmed de-energized and the documentation is complete, shift your attention to personal safety.
Personal Safety Measures
Personal safety involves more than just wearing protective gear. Remove any metal jewelry and wear long-sleeved shirts and pants to reduce the risk of arc flash injuries. Ensure clothing is snug and avoid anything loose that could catch on equipment.
Choose sturdy leather footwear with rubber soles and closed toes to protect against dropped tools and accidental contact with energized components. Keep a dry towel handy to wipe away sweat, and when possible, work with one hand to minimize the risk of creating a conductive path.
Stay alert to your surroundings. Be mindful of overhead power lines, wet areas, and other hazards, especially around flammable materials. Electrical currents can cause severe injuries, and arc flash temperatures can reach several thousand degrees Fahrenheit. These dangers highlight the importance of following rigorous safety practices when working with electrical systems.
sbb-itb-501186b
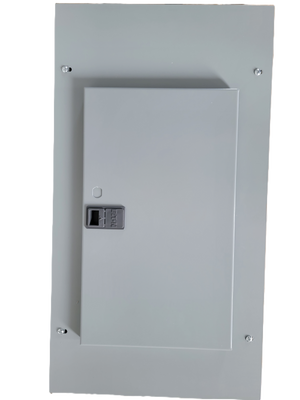
Circuit Breaker Maintenance Checklist
When working on a de-energized circuit, follow this checklist to ensure safety and reliability. Each step is designed to maintain proper operation and extend the lifespan of the equipment.
Visual and Mechanical Inspection
Start by examining the panel for any visible issues like cracks, burns, discoloration, or melted areas. Pay close attention to these signs, as they may indicate overheating or other serious problems. Check that all breakers are seated correctly and reset any that appear tripped.
Inspect all connections for looseness or signs of corrosion. Loose connections can increase resistance, which may lead to overheating or equipment failure.
Ensure the switchgear is properly anchored, aligned, and grounded. Verify that clearances meet safety requirements and that all labels and markings are accurate and legible.
Electrical Testing Procedures
While visual inspections are essential, electrical testing uncovers hidden issues. Before starting, confirm that the work area is safe and wear the appropriate personal protective equipment.
- Insulation Resistance Testing: Use a digital multimeter or insulation tester to assess the condition of the wiring. Record all readings for future reference.
- Connection Testing: Check the integrity of all electrical connections by testing each phase and conductor for proper continuity and resistance levels.
- Overload Tripping Tests: Simulate excessive load conditions to ensure the breaker responds as expected. These tests confirm that the protection system will function correctly in real fault scenarios.
"The ability of a circuit breaker to reliably disconnect in the case of overcurrent or earth fault is a matter of property and people protection. Proper functioning relies on consistency between circuit-breaker setting, tripping curves, and power system characteristics (e.g., rated power of sources, impedances, length, and cross-section of cables)." - Schneider Electric Blog
A real-world example highlights the importance of testing: A major U.S. utility company recently avoided a massive blackout impacting over 500,000 customers. During routine maintenance, engineers discovered abnormal resistance readings in a critical substation breaker. Upon closer inspection, they found severe contact wear that could have caused a failure during peak demand. By replacing the breaker in advance, they prevented an outage that would have cost millions in lost revenue and repairs (Source: Think Power Solutions, 2025).
Once testing is complete, move on to cleaning and lubrication.
Lubrication, Cleaning, and Adjustments
Cleaning removes dirt and debris that can interfere with proper functioning. Use isopropyl alcohol and vacuum tools to clean components, and apply manufacturer-recommended lubricants to moving parts to reduce friction and prevent rust . Be sure this work is done by trained professionals to avoid damaging sensitive parts.
"Lack of lubrication or the deterioration of the lubricant is one of the leading causes of breaker failure leading to industrial circuit breaker repair." - Quad Plus
Calibrate protection relay settings to ensure accurate fault detection and proper tripping. Regularly operate the breaker during maintenance to keep it free of rust and dirt buildup.
Testing How the Breaker Works
Manually and automatically cycle the breaker through its full operating sequence to ensure everything functions smoothly. Check that mechanical linkages move freely and that electrical contacts form solid connections. Test all control circuits and auxiliary contacts to verify they operate in the correct order. Record cycle timings to identify any signs of mechanical wear.
Final Testing and Inspection
After completing individual checks, conduct a final comprehensive test to confirm the circuit breaker meets U.S. safety standards. Re-test key electrical parameters, verify ground connections, and ensure all adjustments align with manufacturer and code requirements.
Double-check calibration settings and mechanical adjustments, and inspect the work area to ensure no tools or foreign objects are left behind. Finally, review documentation to confirm all test results, adjustments, and observations have been accurately recorded for future maintenance needs.
After Maintenance: Power Restoration and Records
Restoring Power and Monitoring
Restoring power after maintenance requires a cautious approach to avoid hazards and equipment damage. Start by clearing the work area of tools and foreign objects, and ensure all personnel have exited before removing Lockout/Tagout (LOTO) devices and signage.
Before re-energizing, adhere to OSHA guidelines:
"After a circuit is de-energized by a circuit protective device, the circuit may NOT be manually re-energized until it has been determined that the equipment and circuit can be safely re-energized." – OSHA Code of Federal Regulation 1910.334(b)
This means the cause of the fault that led to the maintenance must be identified and resolved. Confirm that the protective device is in working order based on the manufacturer's recommendations. It's also essential to ensure your facility's coordination study is up to date and that trip units are correctly adjusted. Create a written system restoration plan that outlines the exact sequence for re-energizing your electrical system. To reduce initial load demand, turn off light switches and unplug appliances in areas affected by the power outage. Then, gradually restore power according to your plan and the manufacturer’s instructions.
Once power is restored, thorough monitoring is critical. Check voltage levels at multiple points, observe load distribution across phases, and stay alert for unusual sounds, vibrations, or visual signs of potential issues. A 2021 case highlighted how even slight deviations in trip coil waveforms can double interrupt times, emphasizing the importance of vigilant monitoring. Additionally, wait a few minutes before turning on appliances with electronic components to minimize the risk of voltage fluctuations.
After confirming stable system behavior, the next step is documenting the maintenance process.
Recording Maintenance Work
Accurate record-keeping following power restoration is more than just a good habit - it’s a legal requirement in the U.S. under safety standards. NFPA 70E specifies that electrical equipment must be maintained per manufacturer instructions, with all activities thoroughly documented.
Your records should include detailed notes on every inspection, test, measurement, and adjustment, along with the date, time, personnel involved, and environmental conditions. For instance, document test results such as insulation resistance readings, contact resistance measurements, and timing test data.
Maintain a dedicated maintenance file for each circuit breaker, including manufacturer specifications, previous maintenance records, and any repairs or modifications. This documentation not only ensures compliance during audits but also helps track equipment performance trends and aids in planning future maintenance. Be sure to include details about LOTO procedures, safety measures implemented, and any incidents or near-misses during maintenance.
Store these records in both physical and digital formats to ensure long-term accessibility. Many facilities use maintenance management software to schedule future tasks, track work orders, and generate compliance reports, streamlining the entire process.
Cleaning and Testing Methods Comparison
Selecting the right cleaning and testing methods is crucial for maintaining long-term equipment performance. Each method and tool comes with its own set of strengths and limitations. Understanding these can help tailor your approach based on your facility’s needs.
| Method/Tool | Advantages | Disadvantages | Best Use Cases |
|---|---|---|---|
| Isopropyl Alcohol | Dries quickly; non-conductive when dry; removes oils and residues effectively | Flammable; costly for large areas | Cleaning contacts, removing flux residues |
| Compressed Air | Reaches tight spaces; leaves no chemical residue | May spread contamination; ineffective on oils | Removing loose debris; initial cleaning |
| Digital Multimeter | Portable; measures multiple parameters | Limited to basic checks; misses intermittent faults | Routine voltage and resistance checks |
| Insulation Tester | Detects insulation issues; provides trending data | Requires training; single-purpose; expensive | Annual insulation tests; moisture detection |
| Contact Resistance Tester | Identifies connection problems; measures micro-ohm resistance | Expensive; time-consuming setup; requires training | Critical connection testing; fault investigation |
For routine cleaning tasks, isopropyl alcohol and compressed air are often sufficient, while digital multimeters are ideal for basic electrical checks. For deeper insights into equipment health, tools like insulation testers and contact resistance meters are invaluable. Combining multiple methods often yields the most thorough assessment of a circuit breaker’s condition.
When sourcing replacement parts or upgrading your testing tools, platforms like Electrical Trader (https://electricaltrader.com) offer a range of new and used electrical components, helping you manage costs effectively while maintaining system reliability.
Conclusion: Maintaining Safety and Performance
Key Points to Remember
A solid maintenance routine is crucial for protecting lives and keeping your electrical systems running smoothly. Studies reveal that properly maintained circuit breakers can reduce outages by 30% and prevent equipment failures in over half of all cases.
For high-voltage circuit breakers, inspections should occur every six to 12 months. Medium-voltage breakers need annual servicing or checks after every 2,000 operations. MCCBs should be exercised annually, with trip testing every three to five years, while low-voltage power circuit breakers (LVPCBs) require a thorough maintenance check every one to three years.
Key tasks like visual inspections, electrical testing, lubrication, cleaning, calibration, and detailed documentation work together to minimize downtime and improve system performance. For example, regular lubrication and visual checks are essential for avoiding failures. Testing trip mechanisms ensures quick responses to faults, and acting promptly on test results can cut downtime by up to 40%.
Accurate documentation is another cornerstone of effective maintenance. Keeping detailed records helps monitor equipment performance, ensures compliance with regulations, and informs future maintenance strategies. Beyond safety, routine maintenance extends the lifespan of your equipment, boosts reliability, improves energy efficiency, and ensures adherence to electrical codes. Having the right tools only strengthens these efforts.
Where to Find Tools and Equipment
To perform these critical maintenance tasks safely and effectively, you’ll need reliable tools and personal protective equipment (PPE). Platforms like Electrical Trader offer high-quality tools and PPE from trusted manufacturers, helping you stay compliant and safe during maintenance.
When it comes to replacement parts, testing equipment, or upgrading your tools, Electrical Trader serves as a one-stop shop for both new and used electrical components and power distribution equipment. This resource allows facilities to manage maintenance costs while ensuring access to dependable products from reputable brands.
Investing in quality equipment is essential - not just a recommendation. NASA’s 1992 findings highlight the risks of using unreliable or refurbished circuit breakers, which can lead to premature trips, failures, or even catastrophic explosions. Sourcing from trusted suppliers is non-negotiable when it comes to electrical safety. With regular, thorough maintenance and the right tools, you can safeguard both your equipment and the people who rely on it.
FAQs
What are the essential safety steps for maintaining a circuit breaker?
To maintain safety during circuit breaker maintenance, the first step is to de-energize the system and confirm it’s off using a voltage tester. Implement Lockout/Tagout (LOTO) protocols to avoid any chance of accidental re-energization. Make sure to wear the right personal protective equipment (PPE), including insulated gloves, safety glasses, and flame-resistant clothing.
Take time to inspect and clean the breaker’s contacts and insulation to keep it functioning correctly. Use tools specifically designed for electrical work, and always stick to the manufacturer’s instructions for maintenance. Staying cautious and following these steps helps reduce risks and ensures the breaker operates as it should.
How often should circuit breakers be maintained to meet safety standards?
When it comes to circuit breaker maintenance, the schedule largely depends on the breaker's type and how frequently it's used. For medium-voltage breakers, maintenance is usually recommended once a year or after completing 2,000 operations. On the other hand, high-voltage breakers should typically be serviced every six to 12 months to keep them operating safely and efficiently.
Adhering to these timelines not only helps avoid potential malfunctions but also prolongs the lifespan of the equipment while ensuring compliance with safety standards in the United States.
What tools and safety gear are necessary for circuit breaker maintenance?
To carry out circuit breaker maintenance safely, having the right tools is non-negotiable. These include screwdrivers, pliers, wire strippers, multimeters, breaker finders, and insulated tools. Each of these plays a crucial role in helping you handle electrical components accurately and securely.
In addition to tools, personal protective equipment (PPE) is a must. This includes rubber-insulating gloves, leather protectors, safety glasses, insulated hand tools, arc flash clothing, face shields, helmets, hearing protection, and flame-resistant clothing. This gear is designed to shield you from electrical hazards, making safety the top priority during maintenance work.