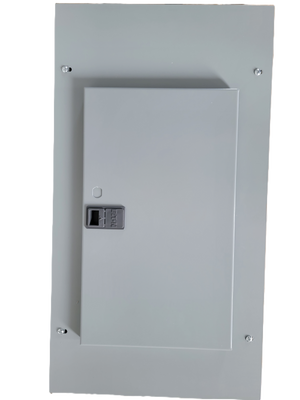
Circuit Breaker Maintenance Checklist
Share
Maintaining circuit breakers is critical for safety and performance. Regular upkeep prevents electrical hazards, extends equipment lifespan, and ensures compliance with safety standards like NFPA 70E and OSHA. Here's what you need to know:
- Why It Matters: Circuit breaker failures can cause power outages, fires, or dangerous arc flashes. Regular inspection and maintenance reduce these risks.
-
Key Steps:
- Visual Inspection: Check for physical damage, overheating, or corrosion.
- Safety Measures: De-energize systems, use voltage testers, and follow Lockout/Tagout (LOTO) protocols.
- Cleaning & Lubrication: Clean contacts with proper tools and apply manufacturer-approved lubricants to moving parts.
- Electrical Testing: Conduct insulation resistance tests, check trip settings, and verify operating mechanisms.
- Advanced Diagnostics: Use thermal imaging and vibration testing to detect hidden issues.
- Documentation: Keep detailed maintenance records to track performance and ensure compliance with regulations.
Routine maintenance ensures reliable operation, reduces downtime, and enhances safety. Start by following a structured checklist and consulting manufacturer guidelines.
Circuit Breaker Maintenance | Vaccum Circuit Breaker Maintenance | How to do Breaker maintenance
Visual Inspection and Safety Steps
Start maintenance by ensuring the circuit breaker is in good physical condition and safely disconnecting it from the power source. Carefully inspect all components and de-energize the system to minimize the risk of accidents. Follow these steps for a thorough visual and safety evaluation.
Check for Physical Damage
Examine the exterior of the circuit breaker closely. Pay special attention to the casing, terminals, and insulation for the following:
- Cracks or dents
- Signs of overheating, such as discoloration, melted plastic, or scorch marks
- Corrosion or rust
- Loose or damaged connections
Any physical damage could weaken the breaker and increase the likelihood of electrical failures or even fires. If you spot any of these issues, avoid trying to fix them yourself - reach out to a licensed electrician for a proper assessment and repairs.
Also, stay alert for unusual sounds or smells. Buzzing, humming, or crackling noises could point to loose connections or arcing, while a burning odor is a critical warning of overheating.
Follow Safety Procedures
When working with electrical systems, safety should always come first. To ensure a safe environment, isolate the power and confirm it’s completely off:
- Turn off the main breaker and isolate the panel or board
- Use a voltage tester or multimeter to verify the circuits are de-energized
Implement a Lockout/Tagout (LOTO) system to prevent accidental re-energization.
Always wear the right personal protective equipment (PPE). Insulated gloves and safety goggles can protect you from electrical shock and arc flash, while safety harnesses or fall protection gear are essential for work in confined spaces or at heights. Avoid wearing loose clothing or jewelry that could accidentally contact live components.
If you notice burning, smoke, or experience an electrical shock, immediately shut off the main power and contact a licensed electrician for assistance.
Cleaning and Lubrication Steps
Once safety measures are in place, it’s time to focus on cleaning and lubricating your circuit breaker components. These steps are essential for maintaining reliable operation. Cleaning removes contaminants that can lead to malfunctions, while proper lubrication ensures smooth movement and reduces wear.
Clean Contacts and Components
After completing your visual inspection, begin by cleaning all contacts to eliminate any contaminants identified earlier. Use high-pressure air to blow away dust, dirt, or debris from the surfaces. For a deeper clean, apply a specialized electrical contact cleaner. These cleaners come in two main types: solvent-based for heavy-duty cleaning and non-solvent-based for more delicate parts. Choose a cleaner that dries quickly, is non-conductive, and leaves no residue.
Apply the cleaner using a cotton swab or a soft brush, targeting areas with visible oxidation or buildup. After cleaning, make sure to remove any leftover cleaner or debris. For the exterior and interior surfaces of the breaker, use a soft, dry cloth to wipe away any remaining dust or dirt. Allow everything to dry completely before moving forward.
Lubricate Moving Parts
Next, apply manufacturer-approved lubricants to critical areas to ensure smooth operation and prevent wear. Focus on parts like primary and auxiliary connections, pivot points, and the operating mechanism. Use a thin layer of lubricant - too much can attract dirt and cause other issues.
Pay extra attention to latch faces and rollers within the operating mechanism. Clean these areas thoroughly before applying a light coat of lubricant. Keep in mind that circuit breaker contacts generally don’t require lubrication unless they’re in a corrosive environment. Always refer to the manufacturer’s guidelines for treating current-carrying components.
For example, MOLYKOTE® 3451 is a chemical-resistant bearing grease often recommended for these applications. Different lubricants, such as penetrating fluids, greases, and oils, serve specific purposes within the breaker mechanism, so choose accordingly.
Check Oil Quality
If your circuit breaker uses oil for insulation and arc suppression, maintaining its quality is essential. Oil serves multiple functions: it insulates, cools the contacts, and helps extinguish arcs. Regularly test the oil for contamination, moisture, and dielectric strength to ensure it’s performing as intended. Contaminated oil can lose its insulating properties, leading to potential flashovers or equipment failure.
Look for signs of water contamination, such as cloudiness or separation, and check for metal particles or carbon deposits that may indicate wear. Always use the manufacturer-recommended oil grade and avoid mixing different types, as this can cause chemical reactions. Replace oil that shows significant contamination, excessive moisture, or reduced dielectric strength. Keeping detailed records of oil tests and replacements can help you track trends and plan future maintenance effectively.
Electrical Testing and Setup
Once the cleaning and lubrication are complete, the next step is to verify the breaker's electrical performance. These tests ensure the breaker can protect your system and operate safely under different scenarios. This involves checking insulation quality, confirming the proper functioning of operating mechanisms, and ensuring the trip settings align with your system's needs. Performing these tests accurately is crucial for reliability.
Run Insulation and Resistance Tests
Insulation resistance testing is essential for assessing the quality of a breaker's electrical insulation. This test helps prevent faults and ensures the system meets safety standards. It involves applying a DC voltage across the insulation and measuring resistance between conductors - higher resistance indicates better insulation.
Start by de-energizing, isolating, and cleaning the breaker to eliminate any factors that could interfere with the test. Use a megohmmeter rated for 500–1,000 Vdc to take precise measurements.
Perform the test in three configurations:
- From each phase to ground with the breaker contacts closed.
- Between phases with contacts closed.
- Between each line and load terminal with contacts open.
For medium-voltage systems, use test voltages ranging from 500 V to 5 kV. Connect the insulation tester's positive lead to the live conductor and the negative lead to the frame or ground. Apply the selected voltage for one minute and record the resistance values. Any reading below one mega ohm (1,000,000 ohms) requires investigation, as per NEMA AB-4 guidelines.
Keep in mind that environmental factors, like high humidity, can lower insulation resistance. Compare your results to the manufacturer's specifications and past test data. A steady decline in resistance over time may signal the need for maintenance or replacement.
Test Operating Systems
After insulation tests, focus on the mechanical performance of the breaker. This involves checking the operating mechanisms to ensure the breaker will function as required during a fault. Key steps include verifying opening and closing times, measuring contact resistance, and confirming that the tripping mechanisms work as designed.
Use specialized timing testers to monitor moving parts and validate operation times. Pay attention to details such as main contact times, pre-insertion resistor contact times, phase differences, stroke, overtravel, rebound, velocity, and coil current.
Contact resistance testing is another critical step. By measuring the resistance across closed contacts with a resistance tester, you can identify poor connections that could lead to overheating or failure.
To simulate fault conditions and ensure protective functions activate correctly, use circuit breaker analyzers or primary/secondary injection test sets. Regular testing like this is a vital safety measure that helps prevent electrical failures and potential hazards such as fires.
Adjust Trip Settings
Proper trip settings are crucial for protecting your system while avoiding unnecessary trips. For breakers rated above 100 A, such as molded case circuit breakers (MCCB) or air circuit breakers (ACB), accurate configuration is essential to guard against overloads, short circuits, and ground faults.
Before making adjustments, ensure the breaker is open. Match the settings to your system's design parameters and selectivity goals. Testing should confirm that the breaker detects overcurrent conditions and that the mechanical tripping components respond as intended.
Document all settings in a digital logbook to maintain a clear record for future reference. For instance, devices like the ComPacT NSX from Schneider Electric should have their trip curves tested every two years under normal conditions.
Digital tools can simplify testing and record-keeping. Periodic checks of the breaker settings throughout its lifecycle will ensure they remain aligned with your system's design and help catch early signs of potential issues.
sbb-itb-501186b
Advanced Maintenance and Monitoring
After routine cleaning and basic electrical checks, advanced diagnostics take maintenance to the next level by uncovering hidden issues that might lead to failures. Tools like thermal imaging, vibration analysis, and environmental monitoring help identify early warning signs, reducing the risk of unplanned downtime.
Thermal and Vibration Testing
Thermal imaging is an effective way to spot hot spots caused by loose connections, overloading, or failing insulation. Start by performing a baseline thermal scan, then compare subsequent annual scans to detect changes over time. Schneider Electric USA emphasizes, "Thermal scans are best used as a preventative maintenance tool".
During these inspections, focus on temperature differences between similar breakers operating under similar loads. Also, check for signs like wire discoloration, unusual odors, or loose connections that may indicate overheating.
Vibration testing adds another layer of insight. Using accelerometers on the breaker housing, this method can uncover mechanical issues, which account for 70% of breaker malfunctions. By analyzing shifts in timing and magnitude, vibration testing can pinpoint potential problems early.
"The objective of all circuit breaker diagnostic testing is to detect defects before they cause damage and system outages...one that receives less attention than it deserves is vibration testing." - Romain Douib, Product Marketing Manager, Megger
For accurate results, ensure consistent placement of accelerometers and compare new vibration data to reference signatures recorded when the breaker was in good condition. Combine vibration analysis with motion, timing, and coil current tests for a thorough evaluation.
Monitor Environmental Conditions
Breaker performance and lifespan are heavily influenced by environmental factors like temperature and humidity. High temperatures can lead to thermal expansion, insulation breakdown, and loss of vacuum integrity in vacuum circuit breakers. On the other hand, cold environments increase contact resistance and can cause condensation, frost, or material brittleness.
Humidity levels also play a critical role. Aim to keep indoor humidity between 30% and 50%, avoiding levels above 60%. Excess humidity can lead to corrosion and short circuits, while low humidity increases the risk of electrostatic discharge.
"Temperature and contamination are the principal environmental factors associated with dielectric system breakdown." - Powell Industries
To mitigate these risks, install breakers in temperature-controlled enclosures for extreme environments. Maintain proper ventilation and use cooling mechanisms like fans or heat sinks to manage heat. Dehumidifiers or humidity monitors can help maintain optimal moisture levels.
Modern systems, such as Powell Electric's EcoVisor, monitor conditions like temperature, humidity, and dust accumulation within enclosures. Similarly, Dynamic Ratings' Breaker Performance Monitor uses sensors to track parameters like insulating gas density, temperature, and humidity.
Test Oil in Oil-Filled Breakers
Oil analysis is a critical diagnostic tool for oil-filled breakers, helping to detect issues like contact wear, fluid degradation, and interrupter problems before they escalate. A condition-based oil analysis program can also help lower maintenance costs.
Follow established standards like ASTM D923 to ensure consistent and reliable oil sampling. Key tests include dielectric breakdown voltage, color evaluation, power factor measurement, interfacial tension, acidity (neutralization number), water content, and visual inspection.
For dissolved gas analysis, use proper sampling techniques, such as glass syringes, to avoid contamination. When interpreting results, consider the breaker's operating conditions, component origins, and any unusual activity. Compare findings to baseline values for new oil and track trends over time.
"Application of this diagnostic tool allows maintenance personnel to depart from traditional time-based maintenance practices by monitoring the condition of units to determine when maintenance becomes necessary." - TJ|H2b
Regularly review and update alarm thresholds based on new data and operational changes. Think of oil analysis as the "blood test" for your breakers - it offers early warnings that enable proactive maintenance and reduce the likelihood of unexpected failures.
Records and Compliance
After cleaning, testing, and running diagnostics, keeping detailed records and meeting compliance standards are critical steps in any thorough maintenance program. Accurate documentation helps track performance, demonstrate compliance, and reduce risks. The National Electrical Code emphasizes maintenance over 275 times, underscoring its importance in electrical safety.
Keep Detailed Records
Once you've verified electrical performance, record your findings with precision. Start by building a maintenance database that includes essential equipment details, such as:
- Equipment type, manufacturer, year, and serial number
- Technology (e.g., SF6, oil, air-blast)
- Location and electrical specifications
- Installation date
Beyond these basics, log operational details from each maintenance session. This should include inspection results, repair notes, test readings (e.g., temperature, insulation resistance, and contact resistance), oil quality and moisture levels, incident reports, interventions, instructions, and the tools used. Comprehensive records make future upgrades easier and serve as proof of compliance for inspections or insurance audits. Using a Computerized Maintenance Management System (CMMS) can streamline this process, especially for managing multiple breakers across various sites.
Detailed logs also play a key role in preventive maintenance. For example, in manufacturing settings, well-kept records can minimize downtime by enabling proactive scheduling based on observed patterns. Regularly reviewing these records helps identify trends, flag potential issues early, and ensure maintenance tasks stay on track. Transitioning from paper logs to digital platforms can further improve efficiency and collaboration.
Follow Manufacturer Instructions
Manufacturer guidelines should always guide your maintenance schedules and procedures. These recommendations are based on extensive testing and real-world experience, factoring in operating environments, duty cycles, and wear patterns. Following these instructions not only extends equipment lifespan but also helps maintain warranty protections.
Maintenance logs are also valuable for training new technicians. By studying documented issues and successful solutions, your team can build expertise and refine their approach to maintenance.
Meet Code Requirements
In addition to manufacturer recommendations, compliance with regulatory codes is non-negotiable. Adhere to standards like NEC/NFPA 70, OSHA guidelines (including NFPA 70E), and NFPA 70B maintenance procedures .
Before starting any electrical work, consult your local building department, as regional codes may be stricter than national ones. State Plans often require safety standards and enforcement measures that meet or exceed OSHA's requirements.
Regular inspections combined with thorough documentation show a strong commitment to safety and can reduce liability in case of incidents. These records are essential during audits, insurance reviews, or regulatory investigations. A robust electrical safety program - including risk assessments, clear safety protocols, and ongoing employee training - is crucial for managing electrical hazards effectively. With over 5,200 fatal work injuries and 2.6 million cases of workplace injuries and illnesses leading to lost time annually, prioritizing safety is non-negotiable.
Conclusion
Maintaining circuit breakers is key to protecting your electrical systems and ensuring their safe, long-term operation. By following a thorough maintenance checklist - covering everything from visual inspections to advanced testing and proper documentation - you can establish a dependable program to keep your systems running smoothly.
Well-cared-for circuit breakers not only last longer but also operate more efficiently, reducing the likelihood of unexpected failures that could disrupt operations. As Paul Higgins, an experienced electrician and electrical tutor, emphasizes:
"A little care goes a long way in maintaining the safety and efficiency of your electrical system. Having inspection and repairs carried out by a qualified electrician at regular intervals will extend the lifespan of your panel and electrical system overall".
This attention to detail applies to every part of your system, ensuring its overall reliability.
Using high-quality replacement parts is another critical aspect of maintaining system performance. Whether you need new circuit breakers, accessories, or even hard-to-find obsolete components, having access to trusted brands like Allen Bradley, ABB, Cutler-Hammer, Eaton, General Electric, Siemens, Schneider Electric, and Square D makes all the difference. From auxiliary switches and trip units to mounting hardware, the availability of both new and used options helps you maintain your equipment effectively.
Consistency and accurate recordkeeping are equally important. Detailed maintenance records not only support future inspections but also provide vital insights into your system's history. Following manufacturer guidelines ensures you're addressing specific requirements that general maintenance might overlook. Regular inspections, prompt attention to any warning signs, and professional servicing are all essential to keeping your system safe and efficient. Documenting circuit breaker performance also helps identify and address any wear-and-tear issues before they escalate.
FAQs
What are the key warning signs that a circuit breaker might be failing during maintenance?
When performing routine maintenance, keep an eye out for warning signs like frequent tripping, scorch marks, or any visible damage on the breaker. You should also check if the breaker feels unusually hot, notice flickering lights or power fluctuations, or find that it won’t stay reset after switching it back on. Age is another factor - if the breaker has been in use for many years, it might be time to think about replacing it.
By conducting regular inspections and staying on top of maintenance, you can catch these issues early and reduce the risk of electrical hazards. If any of these signs pop up, addressing them quickly is key to keeping things safe and running smoothly.
How often should I maintain my circuit breakers to keep them safe and efficient?
To keep your circuit breakers safe and running smoothly, aim to inspect and maintain them once a year or after about 2,000 operations, depending on their type and how often they’re used. For low-voltage breakers, a check every 1 to 3 years usually works, but yearly inspections are best for ensuring they stay reliable and safe.
Routine maintenance is key to avoiding problems. Make it a habit to clean, lubricate, and inspect your breakers as part of your regular electrical system care.
Can I maintain a circuit breaker myself, or should I hire a licensed electrician?
While you can safely handle simple tasks like visual inspections or clearing away debris with the right precautions, circuit breaker maintenance is usually a job for a licensed electrician. These professionals are equipped to manage more advanced tasks like testing, calibration, and repairs, which demand specific tools and expertise.
Electrical work comes with serious risks, including electric shocks and arc flashes. Bringing in a qualified electrician not only ensures the job is done safely but also guarantees compliance with electrical codes. This approach helps protect both your equipment and your peace of mind.