How to Use Infrared Thermography for Hot Spot Detection
Infrared thermography is a powerful tool for identifying overheating in transformers and electrical systems, helping to prevent failures, downtime, and safety hazards. Using infrared cameras, technicians can detect heat emissions and pinpoint problem areas like faulty connections or overloaded circuits without dismantling equipment. This method ensures safe, accurate, and efficient inspections.
Key Takeaways:
- Why It Matters: Overheating in transformers can double insulation aging rates and lead to failures costing up to $14,000 per MVA in damages.
- Preparation: Wear proper PPE, calibrate your camera, and inspect equipment under a load of at least 40%.
- Inspection Process: Scan for anomalies, focus on critical components (like windings and connections), and document findings with thermal images.
- Common Causes of Hot Spots: Loose connections, overloading, and insulation degradation are typical culprits.
- Action Steps: Address hot spots promptly to avoid costly repairs or failures. Use tools like Dissolved Gas Analysis to monitor internal conditions.
Infrared thermography shifts maintenance from reactive to preventive, saving costs and ensuring system reliability.
Basics of Infrared Thermography Webinar
Preparing for Infrared Inspections
Getting ready for infrared inspections is key to spotting hot spots and ensuring accurate thermal analysis. If you skip critical steps like safety measures, proper equipment setup, or accounting for environmental factors, even the best thermal camera won't give you reliable results. Here's how to prepare for effective and secure inspections.
Safety Protocols and Equipment
Safety is non-negotiable when working with live electrical equipment. Without proper precautions, the risks of severe injury - or worse - are very real. Personal Protective Equipment (PPE) is a must. This includes safety glasses, insulated gloves, and flame-resistant clothing. These essentials should always be worn during inspections, though specific PPE requirements may vary depending on your facility's arc flash study.
Before starting, take a moment to survey the area for potential hazards. Check for exposed conductors, damaged equipment, or signs of previous failures. Pay attention to unusual sounds or smells, like the sharp odor of ozone, which often signals electrical issues.
Calibration of your thermal camera is another critical step. Follow the manufacturer's guidelines to ensure the camera is giving accurate temperature readings. A poorly calibrated camera can either miss dangerous hot spots or create false alarms.
Training is equally important. Technicians need to understand thermography basics, emergency protocols, and proper PPE use. This ensures they can handle unexpected situations safely.
Good communication with facility management and having emergency contacts on hand also make a big difference. Understanding the layout of the electrical system and conducting a thorough hazard assessment beforehand can prevent accidents and streamline the inspection process.
"A well-administered Electrical Preventative Maintenance Safety Program will reduce accidents, save lives, and minimize costly breakdowns and unplanned shutdowns of production equipment." - NFPA 70B
Once safety is covered, it’s time to focus on the load conditions for accurate thermal imaging.
Setting Proper Load Conditions
The success of your thermal inspection hinges on the electrical load. Thermal images need to be captured under appropriate load conditions. If the load is too light, hot spots might not generate enough heat to be detected, leaving potential problems unnoticed.
For transformers, aim for at least 40% load during inspections. This helps reveal issues like connection problems or winding defects, which generate sufficient heat to show up on thermal images. Operating below this threshold can lead to false negatives - serious issues that go undetected because they aren’t producing enough heat.
Timing is also crucial. Align inspections with your equipment's operational cycle. Many industrial facilities have predictable load patterns, so plan your thermographic surveys during periods of normal or high demand. This ensures you’re capturing equipment under realistic working conditions.
Interestingly, some electrical issues become more apparent under lighter loads. Understanding your system's typical operating patterns helps you identify abnormal heating behaviors and interpret thermal images more effectively.
Environmental Factors to Consider
Environmental conditions can significantly influence the accuracy of your thermal readings. Factors like ambient temperature, humidity, wind, and sunlight all play a role. Knowing how these elements affect your equipment allows you to plan inspections more effectively.
For instance, high humidity can make surfaces retain heat, leading to false positives where normal equipment appears too hot. In such cases, allow extra time for the equipment to stabilize and consider how moisture might be affecting your readings.
On the flip side, wind can cool surfaces quickly, potentially masking real hot spots. Strong winds may result in artificially low temperature readings, so try to conduct inspections during calm weather.
Sunlight poses one of the biggest challenges for outdoor inspections. Direct sunlight can heat equipment surfaces unevenly, causing misleading temperature fluctuations. To minimize this, schedule outdoor inspections for early morning, late evening, or overcast days when solar heating is less of an issue.
Even artificial lighting can affect readings, though modern thermal cameras are better at compensating for this.
Outdoor inspections are inherently more complex because of these environmental variables, making indoor inspections generally more reliable. However, when outdoor inspections are necessary, aim to schedule them during times of minimal environmental interference. While this might require some adjustments to your work schedule, the improved accuracy is worth it.
Lastly, keep safety in mind when dealing with weather conditions. Wet environments increase electrical hazards, and extreme temperatures can affect both the equipment and the operator. These factors should be carefully considered during planning to ensure a safe and effective inspection process.
Step-by-Step Infrared Thermography Procedure
Once your safety measures are in place and the conditions are right, it’s time to dive into the actual thermal inspection. Following a structured process ensures you catch potential hot spots and maintain accuracy when assessing the electrical system.
Conducting a Visual Inspection
Start with a wide-angle scan to spot any thermal anomalies. Pay close attention to the exterior of the transformer, noting areas that appear significantly warmer than their surroundings - these could indicate underlying problems.
During this phase, evaluate the overall thermal profile of the equipment. This initial scan helps pinpoint areas that need a closer look.
Double-check your camera settings, including emissivity, reflected apparent temperature (RAT), and ambient temperature. If the transformer is equipped with temperature gauges, compare their readings with those from your thermal imaging camera.
Next, move on to a detailed inspection of critical components.
Focusing on Key Areas
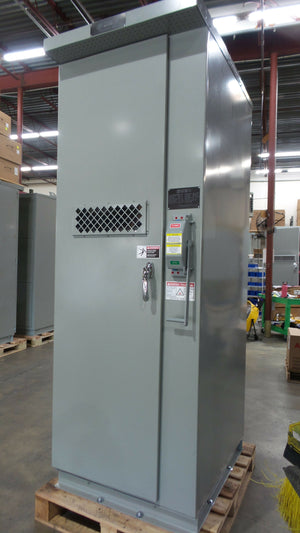
After completing the broad scan, zero in on key components like cooling tubes, bushings, insulators, transformer windings, and electrical connections. These parts are vital for the transformer’s performance and are common sources of hot spots that signal potential issues.
Cooling tubes require special attention because they offer a large surface area for thermal analysis and can be safely examined from outside the danger zone. Look for unusual thermal patterns in the cooling tube banks, which could point to problems like low oil levels, blockages, or misaligned equipment.
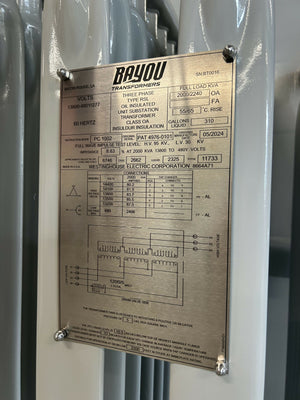
"The key things we normally look at when checking the temperature profile of a transformer are the oil level, power cables, whether a uniform casing exists with no isolated hot spots, and whether the overall casing temperature is within classification limits for the ambient temperature during testing."
- Saira Dar, 3i Condition Monitoring Consultancy, LTD
Bushings and electrical connections are particularly prone to failure. For example, if one connection is noticeably hotter than others under the same load, it could indicate loose hardware or corrosion. Inspecting transformer windings is trickier, but hot spots on the casing might hint at internal winding issues. Keep in mind that a sustained temperature increase of just 8–10°C above the maximum working value can cut the transformer’s lifespan in half.
Once you’ve examined these critical areas, it’s time to document your findings with thermal images.
Taking and Recording Thermal Images
After inspecting the key areas, capture thermal images to document your observations. These images are essential for both immediate analysis and future reference. Ensure your camera is well-calibrated and that IR windows are clear.
Adjust the color scale to suit the temperature range you’re measuring. This enhances thermal contrast without compromising temperature accuracy. Take multiple images from different angles to get a complete view of each component. For consistency - especially if you’re building a trend database - always capture images from the same angle and distance.
Accurate focus is critical for reliable temperature readings. Make sure each image is sharp before recording temperature data.
Thorough documentation is key. Record the load conditions during the inspection, ambient temperature, and any environmental factors that could affect the readings. Note any anomalies, including their location, size, and temperature.
For added context, take visible-light photos alongside your thermal images. Many modern thermal cameras include this feature, which can be extremely helpful when reviewing your findings.
A real-world example highlights the importance of detailed documentation and quick action. During a routine inspection, a Level III thermographer detected a hot spot exceeding 212°F on a 3,000 kVA transformer. Using a FLIR T640 camera and the FLIR Reporter™ App, the thermographer immediately generated a report and sent it to senior management. This led to a rapid shutdown and repair, avoiding a potential catastrophe. The repair cost $85,000, but a complete failure could have cost over $305,000.
Lastly, use thermal imaging software to store, compare, and analyze data from multiple inspections. This software is invaluable for spotting gradual temperature changes that might not stand out in a single inspection.
sbb-itb-501186b
Reading Thermal Images and Finding Hot Spots
After capturing thermal images, the real work begins: analyzing the data. This process is what separates seasoned thermographers from novices. Done correctly, it can help identify issues early, while mistakes could mean overlooking potential failures.
Finding True Hot Spots
One of the toughest challenges in thermal imaging is identifying genuine hot spots while avoiding false positives. Just because an area appears warm doesn’t always mean there’s a problem. Misinterpreting these images can lead to unnecessary repairs - or worse, missing critical issues altogether.
In electrical systems, true hot spots have a specific thermal signature. They usually display a gradient pattern, where the highest temperature is at the connection point and gradually decreases as you move outward.
However, false positives can easily mislead you. Reflections, especially on shiny surfaces like polished metals, can make cool areas look hot. If you spot a "hot spot" on a reflective surface, it might just be a reflection rather than an actual problem.
Environmental conditions can also skew readings. For example, sunlight can unevenly heat surfaces, creating apparent hot spots unrelated to electrical issues. Similarly, wind can cool areas inconsistently, making normal components appear hotter than they are.
With experience, you’ll start to recognize abnormal patterns. For instance, moisture problems often appear with sharp, well-defined edges in thermal images, unlike the gradual gradients typical of electrical hot spots. When moisture is suspected, confirm it using other tools like moisture meters.
"Cold is not always a defect, just an indication." - William Decker, CMI, IL. Lic. 450.002240
Understanding these nuances is key before diving into temperature comparisons.
Using Temperature Differences and Standards
After identifying hot spots, comparing temperature differences is critical for assessing severity. What’s most important isn’t just how hot a component is, but how it compares to similar components under similar conditions. A temperature difference of more than 15°C (25°F) between comparable components often signals the need for immediate attention.
For transformers, this analysis is even more crucial. The winding temperature determines the transformer's capacity and impacts its lifespan. Exceeding safe temperature limits can significantly shorten its operational life. Different insulation classes have specific temperature thresholds, which must be closely monitored.
| Insulation Class | Temperature Limit | Common Applications |
|---|---|---|
| Class A | 221°F (105°C) | Older transformers with Kraft paper |
| Class F | 311°F (155°C) | Modern dry-type transformers |
| Class H | 356°F (180°C) | High-temperature applications |
Temperature plays a huge role in aging equipment. For transformers with thermally upgraded paper, a 13°F (7°C) rise above the rated hot spot temperature of 230°F (110°C) doubles the aging rate. Older transformers with Kraft paper are even more sensitive, with a rated hot spot temperature of just 203°F (95°C). In emergencies, if Kraft paper reaches 284°F (140°C), the aging process accelerates dramatically - one hour at this temperature equals 100 hours of normal aging.
Recording Your Findings
Accurate documentation is essential for effective trend analysis. Make sure to log each anomaly's location, temperature readings, load conditions, ambient conditions, and emissivity settings. Stick to the MM/DD/YYYY date format and 12-hour time format for clarity.
Be as detailed as possible. Instead of vaguely noting that an area is "hot", provide specific data. For example: "Connection A: 156°F, Connection B: 134°F, ΔT = 22°F." This level of precision helps maintenance teams prioritize repairs and track changes over time.
Finally, always involve a qualified electrician for a proper diagnosis. While thermal imaging is a powerful tool, it’s most effective when used by professionals who understand both the measurement techniques and the equipment being inspected. Detailed records ensure timely repairs and enhance system reliability.
What to Do After Finding Hot Spots
Once hot spots are identified, quick action is crucial. A temperature rise of just 14–18°F (8–10°C) above the maximum operating limit can cut a transformer's lifespan in half. Using thermal analysis as your foundation, it's essential to pinpoint the root causes of these hot spots to ensure effective repairs.
Common Causes of Hot Spots
Addressing hot spots starts with understanding their origins. Loose connections are a frequent culprit, often caused by vibrations, aging, or mechanical shocks. In some cases, short circuits can weaken clamping systems, leading to loose connections that generate excessive heat.
Overloading is another common issue. When transformers exceed their rated capacity, internal components heat up beyond safe levels, causing insulation to degrade more rapidly. This is particularly concerning since higher hot spot temperatures accelerate the breakdown of insulating paper.
Internal faults also pose challenges. For example, failed load tap chambers can develop arcing contacts, creating dangerous hot spots. Similarly, loose clamping bolts in the windings can lead to localized heating, which often goes unnoticed without proper monitoring.
Insulation failure can trigger a vicious cycle: as insulation deteriorates, it generates more heat, which further damages the remaining insulation. Environmental factors like moisture and oxygen can also degrade transformer oil, reducing its cooling efficiency.
Older equipment is especially prone to contact resistance issues caused by oxidation or corrosion, which can exacerbate heating. Additionally, mechanical damage to sliding power contacts can create hot spots that worsen under load conditions.
Recommended Repair Actions
The severity of the hot spot should guide your repair strategy. For critical issues, plan repairs during scheduled shutdowns. Replace high-resistance elements, such as corroded contacts, loose bolts, or damaged connectors, to eliminate the heat source. Use a low-resistance ohmmeter to measure joint resistance and compare it against similar components to identify irregularities.
It's also important to consider future load demands when making repairs. A connection that seems stable under lighter loads might fail under full capacity. For more complex internal problems, conducting Dissolved Gas Analysis (DGA) as part of routine maintenance can help assess the condition of transformer oil and detect potential issues early.
A real-world example highlights the importance of timely repairs. In one case, a 3,000 kVA transformer (HV: 11,000 V, LV: 615 V) was found to have arcing contacts in the tap chamber through thermographic inspection. Although the temperature alarm was set at 176°F (80°C), a hot spot exceeding 212°F (100°C) was detected. The repair cost approximately $85,000, while a catastrophic failure would have cost at least $305,000.
When replacement parts are necessary, sourcing reliable components quickly is a priority.
Using Electrical Trader for Equipment Needs

When it comes to replacing components, Electrical Trader offers a convenient solution. This platform serves as a centralized marketplace for new and used electrical parts, making it easier to find what you need quickly.
Specializing in transformers, breakers, and power distribution equipment, Electrical Trader connects you with suppliers across the country. Whether you're looking for a complete transformer replacement or specific parts like bushings, tap changers, or connection hardware, the platform offers a wide range of options.
With both new and used components available, Electrical Trader provides the flexibility to meet your needs while helping to minimize downtime and repair costs. The platform caters to electricians, maintenance teams, and facility managers, offering tools for high-voltage equipment and power generation systems. Timely repairs and high-quality replacements are key to extending transformer life and ensuring system reliability.
Conclusion
Infrared thermography plays a crucial role in ensuring the safety and reliability of electrical systems. Acting as an early warning system, it enables maintenance teams to identify and address issues before they escalate into major safety risks or disrupt operations. This non-invasive technique allows for the inspection of live systems without the need for costly shutdowns, making it both practical and efficient.
According to a 2019 study by the U.S. Department of Energy, over two-thirds of electrical failures can be detected and resolved in advance through annual infrared inspections. Considering that electrical malfunctions are among the top causes of fires in residential and commercial buildings, and nearly 25% of these failures are linked to faulty electrical connections, the value of regular thermographic inspections becomes undeniable.
"Infrared thermography allows professionals to detect problems that are not visible to the naked eye, helping to pinpoint areas of concern before they lead to more serious issues." – Jules Albert III, owner of Jaymar Construction LLC
An effective preventive maintenance program doesn’t just improve safety - it also delivers measurable cost savings. Data shows that such programs can achieve 30–40% savings. In industrial settings, these programs often yield a 10-times return on investment, reduce maintenance costs by 25–30%, eliminate 70–75% of breakdowns, cut downtime by 35–45%, and boost production by 20–25%. These statistics highlight the tangible benefits of disciplined thermal inspections.
Key Takeaways
To maximize the benefits of infrared thermography, follow these essential practices: Conduct inspections at least once a year, or more frequently for facilities with older or critical equipment. Inspections should be performed when systems are operating at a minimum of 40% of their normal load to ensure accurate readings.
Preparation is key. Familiarize yourself with safety protocols, establish proper load conditions, and account for factors like wind and ambient temperatures. During the inspection, focus on critical areas, capture clear thermal images, and document findings thoroughly.
When analyzing thermal images, pay attention to genuine temperature differences, not variations caused by surface conditions. Even minor anomalies can signal deeper issues that may impact equipment performance or lifespan.
Once hot spots are identified, take immediate action to avoid costly failures. Whether the issue involves loose connections, overloading, or internal faults, having access to reliable replacement parts is crucial for maintaining system integrity.
For quality replacement components, visit Electrical Trader, a marketplace specializing in transformers, breakers, and power distribution equipment. The platform connects you with suppliers nationwide, offering both new and used parts like bushings, tap changers, and connection hardware to help minimize downtime and repair expenses.
By combining thorough inspection techniques, precise analysis, and access to dependable replacement parts, you can create a comprehensive maintenance strategy. This approach not only enhances safety by identifying risks before they lead to accidents but also ensures the uninterrupted operation of critical systems and infrastructure.
Infrared thermography shifts maintenance from a reactive approach to a proactive one, enabling facilities to sidestep the high costs of unexpected equipment failures while maintaining top-tier safety standards for both personnel and property.
FAQs
What mistakes should I avoid when using infrared thermography to detect hot spots?
When using infrared thermography to detect hot spots, there are a few missteps that can throw off your results. Here’s what to watch out for:
- Focusing solely on surface temperature: Infrared cameras capture surface heat, but that doesn’t always tell the whole story. Internal problems might go unnoticed if you rely only on surface readings, leading to flawed conclusions.
- Overlooking reflective surfaces: Materials like polished metals can bounce infrared radiation, which can mess with your readings. Always adjust your methods when dealing with reflective surfaces to avoid skewed results.
- Disregarding environmental conditions: Factors like wind, ambient temperature, and sunlight can interfere with your measurements. Take these into account to ensure your readings are as accurate as possible.
- Skipping proper training: Without knowing how to properly operate infrared thermography equipment, mistakes are almost guaranteed. Investing in training can make a big difference in your accuracy and confidence.
By steering clear of these common mistakes and carefully reviewing your data, you’ll improve the dependability of your hot spot detection in electrical systems.
How do wind and sunlight impact the accuracy of thermal imaging during inspections?
Environmental factors like wind and sunlight play a big role in the accuracy of thermal imaging during inspections. Wind, for example, can cause heat to disperse through forced convection. This means it lowers the surface temperature of objects, which can throw off your readings. The stronger the wind, the more it can mask hot spots, making them harder to detect.
Sunlight presents a different challenge. It can lead to reflection and emissivity issues, especially on reflective or shiny surfaces. This can skew readings or create distortions in the thermal image. To get more reliable results, aim to perform inspections during stable conditions - early mornings or late afternoons are ideal. And whenever possible, shield your equipment from direct sunlight and strong winds to minimize these effects.
What steps should you take immediately after detecting a hot spot to avoid equipment failure?
When a hot spot is identified, the first step is to shut down the equipment right away. This helps prevent further damage and reduces the risk of potential hazards. Once the equipment is off, carefully inspect the area to pinpoint the cause. Common culprits might include loose connections, overloaded components, or problems with insulation.
Once the issue is clear, take the necessary steps to fix it. This could mean tightening connections, replacing faulty parts, or enhancing the cooling system. If immediate repairs aren’t possible, you might need to use temporary cooling solutions to control the heat until a permanent fix is ready. Throughout the process, always stick to safety protocols to maintain a secure environment for everyone involved.