How to Calculate Voltage Drop in Solar Systems
Voltage drop is the reduction in voltage as electricity flows through wires in your solar system. It impacts efficiency, safety, and performance. To minimize losses:
- Key Factors: Wire length, material, size, current, and temperature all influence voltage drop.
- US Guidelines: The National Electrical Code (NEC) suggests keeping voltage drop below 3% (2% DC, 1% AC).
- Wire Sizing: Use thicker wires (lower AWG) for longer runs or higher currents to reduce resistance.
-
Calculation Formula: For DC circuits:
Voltage Drop = (2 × L × I × R) / 1000
Convert this to a percentage to ensure it meets NEC limits.
Example: A 150-ft run of #14 AWG wire carrying 8.23 amps results in a 7.75V drop (2.16% at 358V). Upgrading to #12 AWG reduces the drop to 4.98V (1.37%).
To ensure your system runs efficiently, calculate voltage drop, select appropriate wire sizes, and follow NEC recommendations. Use tools like online calculators or NEC tables for accuracy.
Cable Size for Solar Panels - How to Size Wire for Voltage Drop
Factors That Affect Voltage Drop in Solar Wiring
When designing a solar power system, understanding the factors that influence voltage drop is essential. These variables help determine the right wire type and size to ensure efficient electricity transfer from solar panels to inverters or battery banks.
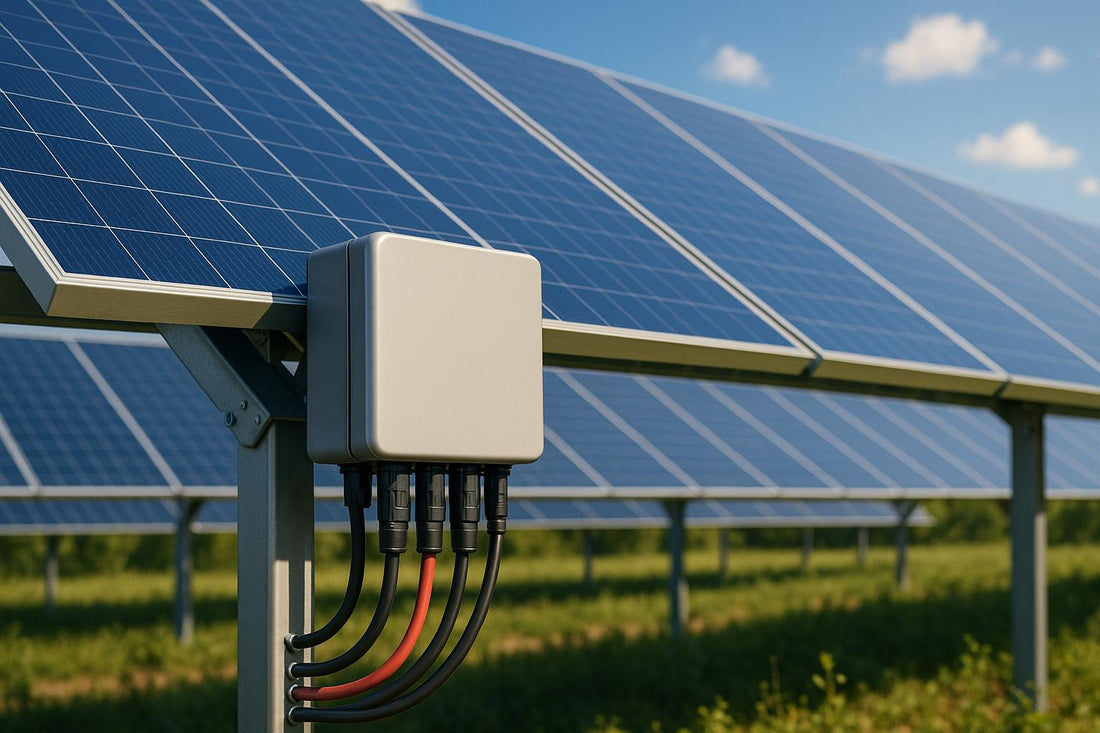
Wire Length and Material
The length of the wire and the material it's made from are key factors in voltage drop. Longer wires increase resistance, and doubling the length doubles the resistance. To counteract this, thicker wires (those with lower AWG numbers) are often recommended, as they reduce resistance.
For instance, a 100-meter 10-gauge copper wire carrying 20 amperes will lose about 7.3 volts, which corresponds to a 3.3% drop at 220 volts.
The type of conductor material also plays a role. Copper wires are more efficient at conducting electricity than aluminum wires, leading to less voltage drop in the system. This is why copper is generally preferred for minimizing losses.
Here’s a quick reference for recommended AWG based on wire length:
| Distance (Feet) | Recommended AWG |
|---|---|
| 0 – 10 feet | 12 AWG |
| 10 – 20 feet | 10 AWG |
| 20 – 50 feet | 8 AWG |
| 50+ feet | 6 AWG or lower |
Current and Voltage Levels
The amount of current flowing through the wire significantly impacts voltage drop, as described by Ohm's law (Vd = I × R). Higher current loads lead to more voltage drop, while higher system voltages reduce the percentage of voltage lost.
In residential setups, system voltages typically range between 300 and 600 volts DC, while commercial systems can go as high as 1,500 volts DC or more. On the AC side, residential systems generally operate between 120 and 240 volts.
Temperature Effects
Temperature also plays a role in voltage drop by affecting the resistance of the conductor. As temperatures rise, the resistance of materials like copper increases. For copper, the resistance increases by approximately 0.393% for every degree Celsius above its baseline temperature.
To calculate resistance at a specific temperature, you can use this formula:
RT = R0 × (1 + α × (T - T0))
- RT: Resistance at the new temperature
- R0: Original resistance at the reference temperature
- α: Temperature coefficient (0.00393 for copper)
- T: New temperature
- T0: Reference temperature
In most cases, wires operating at full load will reach their ampacity-based temperature. However, oversized conductors used to reduce voltage drop tend to stay closer to ambient temperature.
Temperature not only affects wiring but also impacts solar panel performance. Manufacturers provide temperature coefficients in their datasheets, which can be used to estimate module temperature. This is often calculated using the Nominal Operating Cell Temperature (NOCT) model:
Tcell = Tambient + G × (NOCT - 20°C) / 800 W/m²
Here, Tcell is the cell temperature, Tambient is the ambient temperature, G is the solar irradiance, and NOCT is the nominal operating cell temperature from the manufacturer.
How to Calculate Voltage Drop Step by Step
Here’s a straightforward guide to help you calculate voltage drop in your solar system. These steps ensure your system meets electrical code requirements and operates efficiently.
DC Circuit Voltage Drop Formula
The formula for calculating voltage drop in DC circuits is:
Voltage Drop = (2 × L × I × R) / 1000
- L: One-way cable length (in feet)
- I: Current (in amperes)
- R: Resistance per 1,000 feet of the wire
The factor "2" accounts for the round trip of the current, and dividing by 1,000 converts the length into standard units.
Example Calculation
Let’s say you have a solar array 150 feet away from the inverter, carrying 8.23 amperes through #14 AWG wire with a resistance of 3.14 Ω per 1,000 feet. The voltage drop would be:
Voltage Drop = (2 × 150 × 8.23 × 3.14) / 1000 = 7.75 volts
Now, if you upgrade to #12 AWG wire with a resistance of 1.98 Ω per 1,000 feet, the voltage drop decreases to:
Voltage Drop = (2 × 150 × 8.23 × 1.98) / 1000 = 4.98 volts
Once you determine the voltage drop, you can convert it into a percentage to check if it meets NEC recommendations.
How to Calculate Percent Voltage Drop
To compare the voltage drop against NEC limits, convert it into a percentage using this formula:
VD% = (Voltage Drop / Source Voltage) × 100
Using the earlier example with a 358-volt system:
VD% = (7.75 / 358) × 100 ≈ 2.16%
This exceeds the NEC-recommended 2% limit for DC circuits. However, upgrading to #12 AWG wire reduces the percentage to:
VD% = (4.98 / 358) × 100 ≈ 1.37%
This improvement brings the system within NEC guidelines. According to the National Electrical Code, the total system voltage drop should stay under 3%, with up to 2% on the DC side and 1% on the AC side.
"Understanding voltage drop is crucial for maintaining the efficiency of solar power systems." - Shop Solar Kits
AC Circuit Calculations
AC voltage drop calculations are similar but involve additional factors like power factor, inductance, and skin effect. These factors usually have minimal impact in residential and commercial solar systems, but a drop in the power factor (e.g., from 95% to 80%) can increase the voltage drop by about 20% under the same load.
"The voltage drop will be identical for the same current when comparing a DC and an AC source at the same voltage and current. There will be a small difference in the impedance used for the same length in larger sizes, resulting from the need to consider inductance and skin effect at 60Hz." - GoldDigger, Moderator
For three-phase AC systems, the formula changes slightly:
Voltage Drop = (√3 × L × I × R) / 1000
Here, the √3 factor (approximately 1.732) replaces the "2" used in DC calculations, accounting for the phase relationships in three-phase systems.
A notable difference is that DC calculations always use the total round-trip distance, while some AC calculations may only consider the one-way distance, depending on the system design. Although wiring losses in AC and DC systems are nearly the same under similar conditions, the additional variables in AC systems can lead to slight variations in performance. These calculations are essential for selecting the right wire size and ensuring your system runs efficiently.
sbb-itb-501186b
Wire Size Selection to Reduce Voltage Drop
After calculating the voltage drop in your solar system, the next step is selecting the right wire gauge to keep energy losses within acceptable limits. This process requires balancing system performance with compliance to electrical codes. Using the results from your voltage drop calculations, you can determine the best wire gauge for your setup.
Using Voltage Drop Results for Wire Selection
The voltage drop calculation helps you identify the minimum wire gauge required for your system. If the calculated voltage drop exceeds the recommended 2% for DC circuits, choosing a larger wire gauge can lower resistance and improve efficiency. Larger wires, which have lower AWG numbers, reduce voltage loss along the circuit.
Here’s a quick guide to how different wire gauges are commonly used in solar installations:
| Wire Gauge (AWG) | Typical Use in Solar Systems |
|---|---|
| 12 AWG | Ideal for small systems with short distances and low current |
| 10 AWG | Commonly used in residential rooftop systems |
| 8 AWG or 6 AWG | Suitable for larger systems with higher current or longer wiring runs |
| 4 AWG or 2 AWG | Used in very large systems or for long-distance installations |
For example, a 10 AWG copper wire can handle about 30 amps under optimal conditions, making it a popular choice for residential solar systems, where current usually ranges between 8 and 25 amps depending on the system's size and configuration.
If your installation involves longer cable runs, higher voltage systems can help by allowing the use of thinner wires, as they transmit power more efficiently over greater distances.
Copper vs. Aluminum Wire Comparison
Once you’ve determined the appropriate gauge, the next consideration is the wire material. Copper and aluminum are the two primary choices, and each comes with its own set of advantages and trade-offs.
Copper wires are known for their superior electrical conductivity - about 40% higher than aluminum. This means copper wires can be thinner while carrying the same amount of current. Aluminum, on the other hand, is about 61% as conductive as copper, so larger gauge sizes are needed to achieve similar performance.
Here are some key differences between the two materials:
- Conductivity: Copper offers better electrical performance, resulting in lower voltage drop for the same diameter.
- Mechanical Strength: Copper is stronger and less prone to thermal expansion, reducing the risk of loose connections over time.
- Weight and Flexibility: Aluminum is lighter and less expensive but tends to be stiffer and less flexible than copper.
- Cost: Aluminum wires are generally cheaper, making them a budget-friendly option for large-scale installations.
While copper cables typically perform better, aluminum can be a practical alternative for projects where cost savings are a priority, provided the larger size and potential flexibility issues are accounted for.
US Code Requirements for Maximum Voltage Drop
The National Electrical Code (NEC) offers guidelines for acceptable voltage drop limits to ensure system efficiency. For branch circuits, the NEC suggests a maximum voltage drop of 3%, with a combined total of 5% for feeders and branch circuits.
While these voltage drop calculations aren’t mandatory for safety, they are essential for optimizing system performance. In many photovoltaic systems, DC wire losses are often closer to 1% rather than the recommended 2%. However, in scenarios where the solar array generates more power than the inverter can handle, voltage drop becomes less critical. Even so, designing with performance in mind is always a smart approach. Many designers start with the minimum wiring required by code and then model the system to estimate actual DC voltage loss.
Another effective strategy for reducing voltage drop is minimizing the wiring run length by placing components closer together.
If you’re sourcing electrical components for your solar system, Electrical Trader provides a wide range of power distribution equipment to help you manage voltage drop effectively. Choosing the right materials and wire gauge is crucial for meeting NEC standards and ensuring your system operates at peak efficiency.
Calculation Tools and Reference Materials
Getting voltage drop calculations right is crucial for maintaining system performance and selecting the best products for your solar setup. While manual calculations can help you grasp the basics, professional installers often turn to specialized tools and references to save time and ensure accuracy. Below, we'll dive into some of the most effective resources for streamlining these calculations.
Online Voltage Drop Calculators
Online calculators simplify the process by handling the complex formulas for you. These tools typically ask for inputs like wire material, size, circuit length, current, and voltage. Some advanced calculators, such as Southwire's, even incorporate NEC ampacity requirements.
That said, these tools aren't without their quirks. A user on the DIY Solar Power Forum highlighted inconsistencies between calculators from Best Boat Wire, calculatordotnet, and Bay Marine Supply. The issue? Each calculator interpreted the "length" input differently - some required the round-trip distance, while others only needed the one-way measurement. These variations led to different wire size recommendations and cost estimates.
"The current NEC (National Electric Code) recommends systems should be designed with less than 2% voltage drop. In most cases, a properly-designed solar system should come in well under that mark."
To avoid such pitfalls, double-check whether the calculator you're using needs one-way or round-trip circuit length. It's also a good idea to compare results across multiple calculators. And if you're unsure, err on the side of caution by selecting a larger wire size to minimize voltage drop.
NEC Tables and Manufacturer Data
In addition to online tools, NEC tables and manufacturer specifications provide a reliable foundation for accurate calculations. The National Electrical Code (NEC) includes detailed tables that are essential for determining wire sizing and ampacity, particularly for solar PV systems under NEC Article 690.
Some key NEC tables include:
- Table 310.16: Conductor ampacity
- Table 310.17: Ampacity for single-insulated conductors
- Table A2: Resistance values
- Table 310.15(B): Temperature correction factors
Manufacturer datasheets complement these resources by providing critical values like Voc (open-circuit voltage) and Isc (short-circuit current). These values are vital for calculating maximum voltage using the formula:
Vmax = Voc × ns × Cv,
where ns is the number of modules in series, and Cv is the voltage correction factor from NEC tables.
Since the NEC is updated periodically, always confirm which version your local jurisdiction enforces before starting your project. Following these guidelines ensures your calculations meet both safety and performance standards.
Electrical Trader's Solar Wiring Products

Once you've calculated the voltage drop, it's time to select the right components. Electrical Trader offers a variety of solar wiring products that align with NEC requirements.
Their inventory includes:
- PV1-F solar cables, known for their UV resistance, durability, and compatibility with MC4 connectors. Common sizes include 4mm² for systems under 20A and 6mm² for systems handling 20A or more.
- Accessories like heat shrink tubing, lugs, Anderson and MC4 connectors, and cable entry covers, all of which help maintain waterproof connections and reduce resistance.
For circuit protection, Electrical Trader also provides:
- Fuses and holders
- DC circuit breakers with enclosures
- Solar-specific MC4 fuses and diodes
These components, when paired with properly sized wires, ensure your system operates within acceptable voltage drop limits while meeting NEC safety standards. Always prioritize high-quality components and waterproof connections to protect your system from damage and maintain efficiency. Reliable parts from trusted suppliers will ensure your calculations translate into a system that performs as expected.
Conclusion
Accurate voltage drop calculations are a cornerstone of safe and efficient solar installations. The National Electrical Code (NEC) advises keeping the total system voltage drop below 3% to maintain optimal performance.
"Calculating voltage drop is crucial in electrical design to ensure that devices receive adequate voltage for proper operation. Excessive voltage drop can lead to inefficient system performance, equipment malfunction, or even safety hazards."
- Yaneev Hacohen, Electronics Engineer at Flux
Overlooking these calculations can result in power loss, damaged components, and potential safety risks like overheating wires. In both residential and industrial solar setups, unchecked voltage drop can reduce energy efficiency and lead to equipment failure.
Selecting the right wiring is key to managing voltage drop effectively. Copper wires, known for their excellent conductivity, are often preferred, while aluminum wires require thicker gauges to compensate for their higher resistance. Matching the wire type and size to your system's specific needs ensures both performance and durability.
Tools like online calculators and NEC tables make determining voltage drop straightforward. Pairing these calculations with high-quality components, such as those available from Electrical Trader, ensures your system meets safety standards while delivering reliable performance.
To achieve long-lasting results, minimize wire lengths, use properly sized conductors, and ensure secure, high-quality connections. By following these steps and conducting precise voltage drop calculations, you can design solar systems that operate efficiently, safely, and in compliance with all necessary codes for years to come.
FAQs
How does temperature affect voltage drop in solar systems, and how can you minimize its impact?
Temperature has a significant impact on how well solar systems perform. When temperatures climb, the resistance in photovoltaic (PV) cells also increases, which causes a drop in voltage output and lowers the system's overall efficiency. On the other hand, cooler temperatures can improve performance.
Here are some ways to reduce the effects of high temperatures on your solar system:
- Opt for heat-resistant wiring and durable, high-quality connectors to cut down on resistance.
- Make sure there's proper ventilation around the solar panels and other system components.
- Place panels in areas with good airflow to avoid overheating.
Since temperatures above 77°F (25°C) can lead to noticeable power losses, creating the right operating environment is key to getting the most out of your solar system.
Why is copper typically used for wiring in solar systems, and when might aluminum be a better option?
Copper is a popular choice for wiring in solar systems, primarily because of its high conductivity, which helps reduce voltage drop and power loss. It also generates less heat during operation and is incredibly durable, making it a dependable option for long-term use. Plus, copper resists corrosion and retains its strength over time, even under tough environmental conditions.
On the other hand, aluminum can sometimes be a more practical option. Its lower cost and lighter weight make it well-suited for large-scale projects, like long-distance wiring or overhead power lines. While aluminum doesn’t conduct electricity as efficiently and may require more upkeep, it’s often the go-to for outdoor installations where budget constraints and weight are important factors.
What’s the best way to calculate voltage drop in solar systems, and how can I ensure accurate results?
To figure out the voltage drop in solar systems with precision, you can rely on tools like voltage drop calculators or apply manual formulas. These methods need essential inputs such as cable length, current, and wire resistance. A widely used formula is: Voltage Drop = (2 × L × I × R) / 1,000. Here, L represents the cable length (in feet), I is the current (in amps), and R is the wire resistance (in ohms per 1,000 feet).
For accurate results, double-check all input values, stick to consistent measurement units (imperial or metric), and ensure the voltage drop remains within recommended limits - usually under 2% for better efficiency. Getting these calculations right is key to keeping your solar system running efficiently and reducing energy losses.
Related posts
- Ultimate Guide to Low Voltage Equipment
- Checklist for Choosing Solar Inverters
- 8 Common Solar Inverter Problems and Fixes
- How to Choose Solar Monitoring Equipment